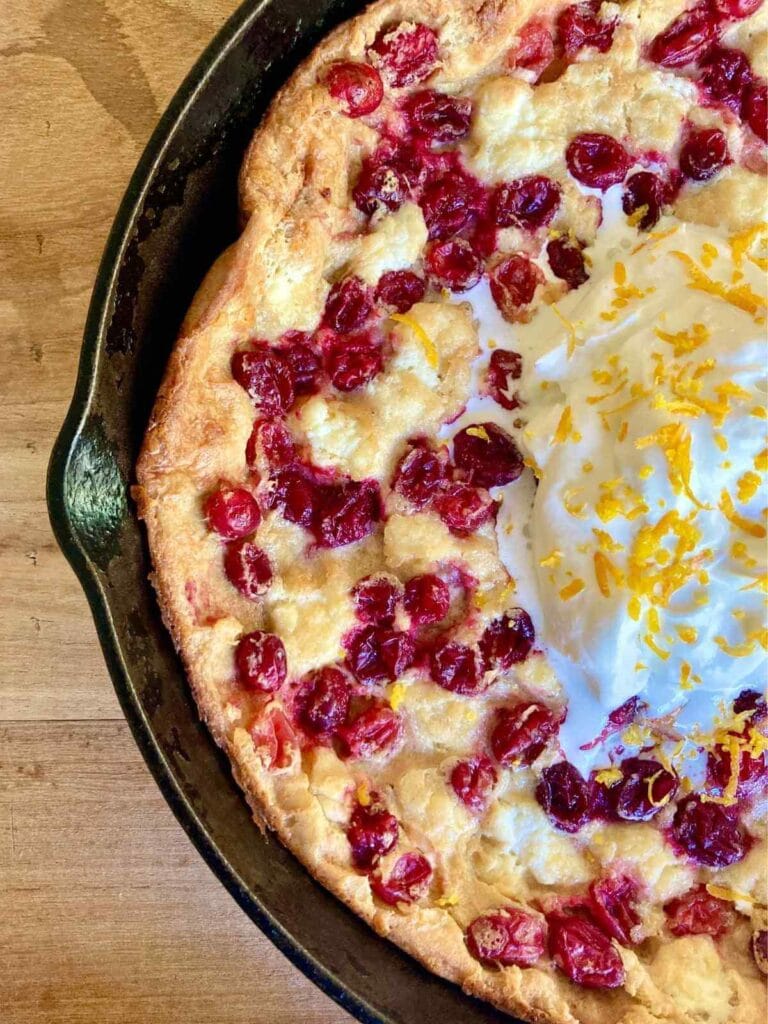
This easy cranberry cheesecake Dutch baby is packed with bursts of tart cranberries and rich cream cheese. It comes together quickly for a secretly healthy holiday breakfast everyone will rave about!
Quick Look at the Recipe
- 🍽️ Flavor: Hearty, eggy base with a rich and creamy cranberry cheesecake flavor
- ⏱️ Prep Time: 10 minutes
- 🔥 Cook Time: 30 minutes
- 🕒 Ready In: 40 minutes
- 👥 Servings: 4 servings
- 🥣 Main Ingredients: Eggs, oat flour, milk, cranberries, cream cheese
- 📋 Protein: 17 grams
- 📖 Dietary Info: Gluten-free, refined sugar-free, dairy-free option
- 👩🍳 Tip: Oat flour adds a rich heartiness and additional nutrition to this Dutch baby to create a filling holiday breakfast.
A Festive & Nourishing Christmas Morning
Breakfast is my favorite Christmas meal, but once I adopted a clean diet, things became a little trickier. My goal is always a nourishing, quick dish (or one that can be prepped in advance like egg strata) that delivers big holiday flavor and a festive presentation.
That’s where this cranberry Dutch baby shines! It takes just 10 minutes to get in the oven, is packed with protein, and made entirely with clean ingredients. However, because of its rich, Christmasy flavor, no one will ever guess that it’s secretly healthy!
What Makes this Cranberry Dutch Baby Special?
- Quick and easy to make with simple kitchen staples.
- Festive holiday flavor with plenty of tart cranberries and rich cream cheese!
- Healthy breakfast option using clean, gluten-free ingredients.

Ingredients
Tools Needed
Step-By-Step Instructions
Step 1: First, preheat your oven to 400 degrees. Put the coconut oil in the skillet and place it in the oven while it’s preheating to melt.
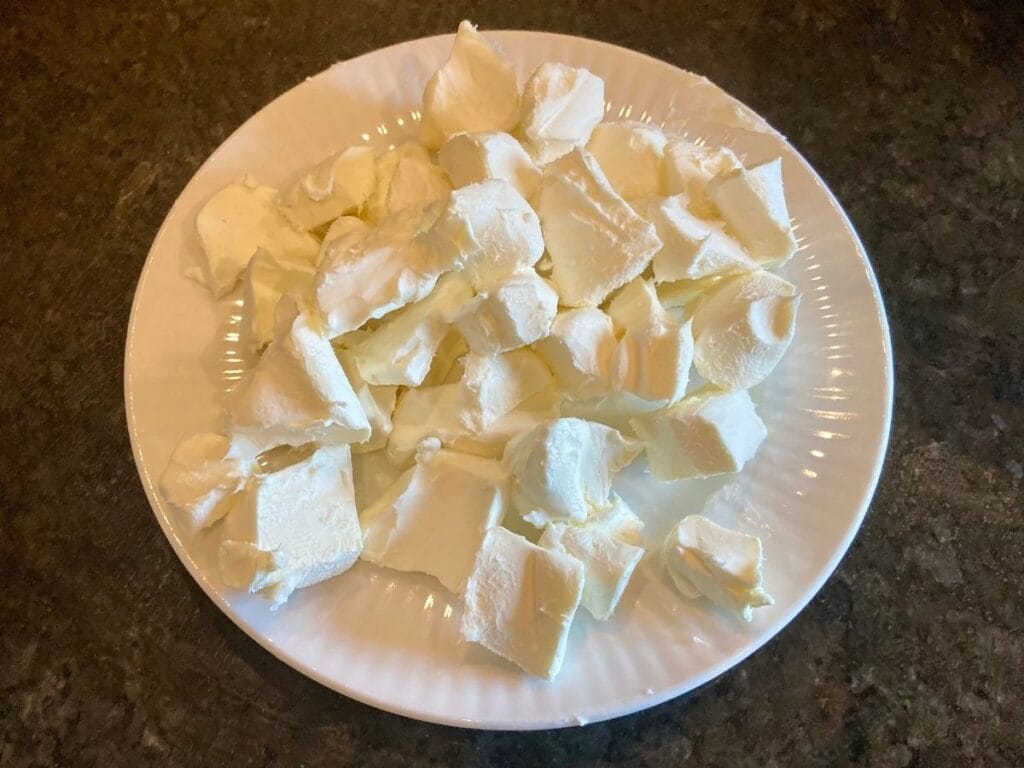
Then cut the cream cheese into small 1/2 inch pieces, and set them aside for later.
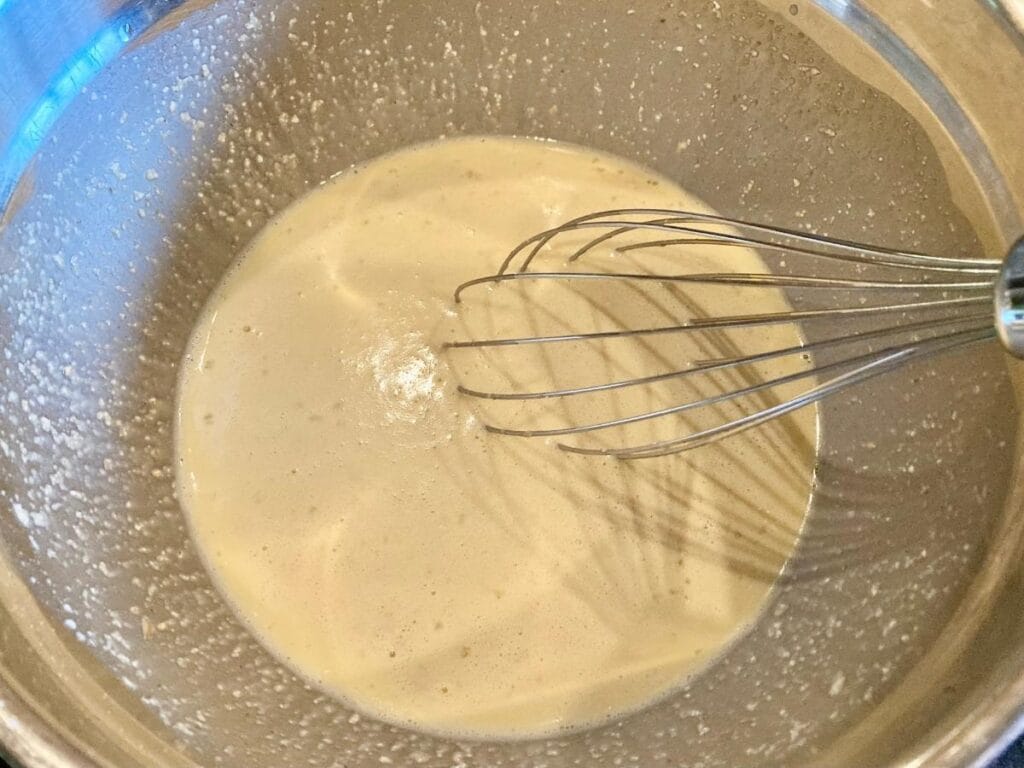
Step 2: In a large mixing bowl, whisk together the eggs, milk, oat flour, coconut sugar, vanilla, and salt.
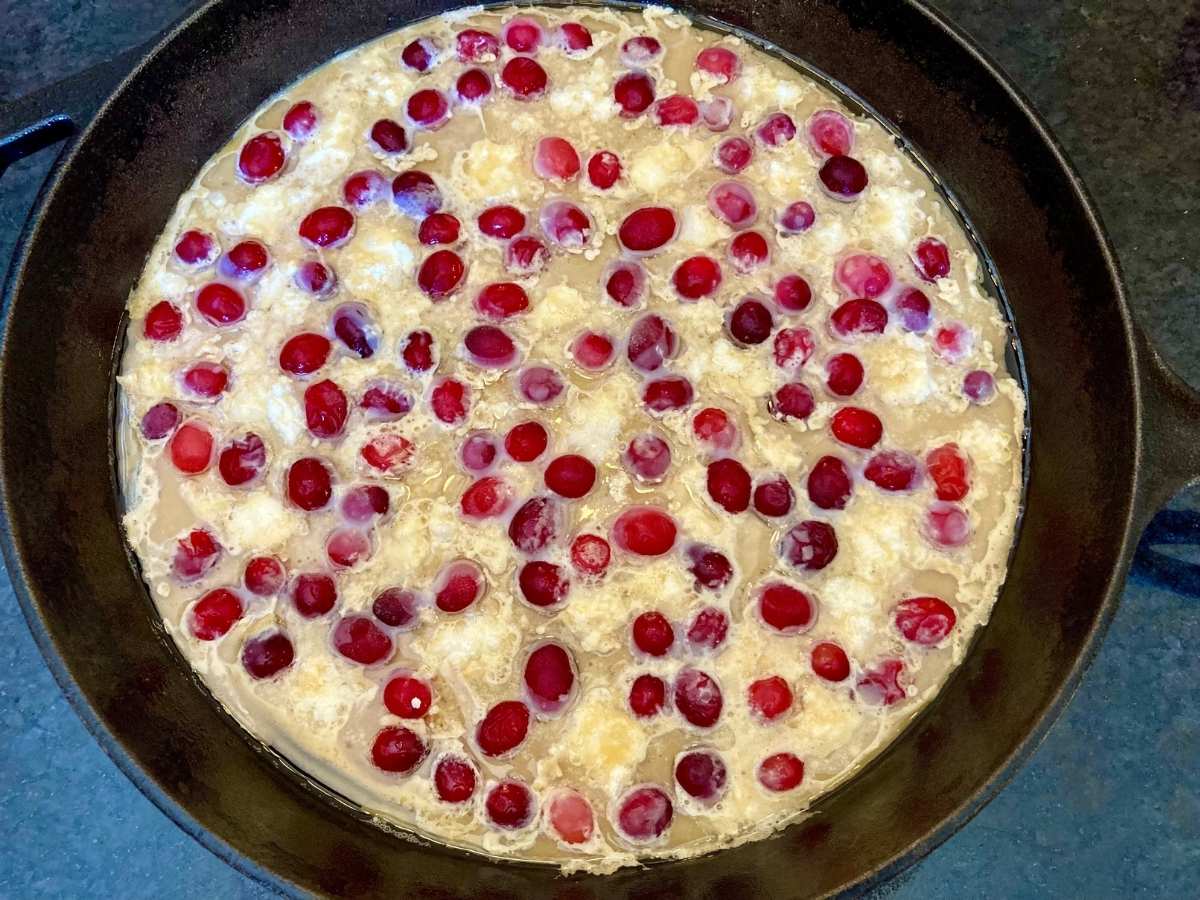
Step 3: Once the oven is preheated, pour the batter into the skillet with the melted oil. Then sprinkle the cranberries and pieces of cream cheese on top, and place the skillet in the oven.
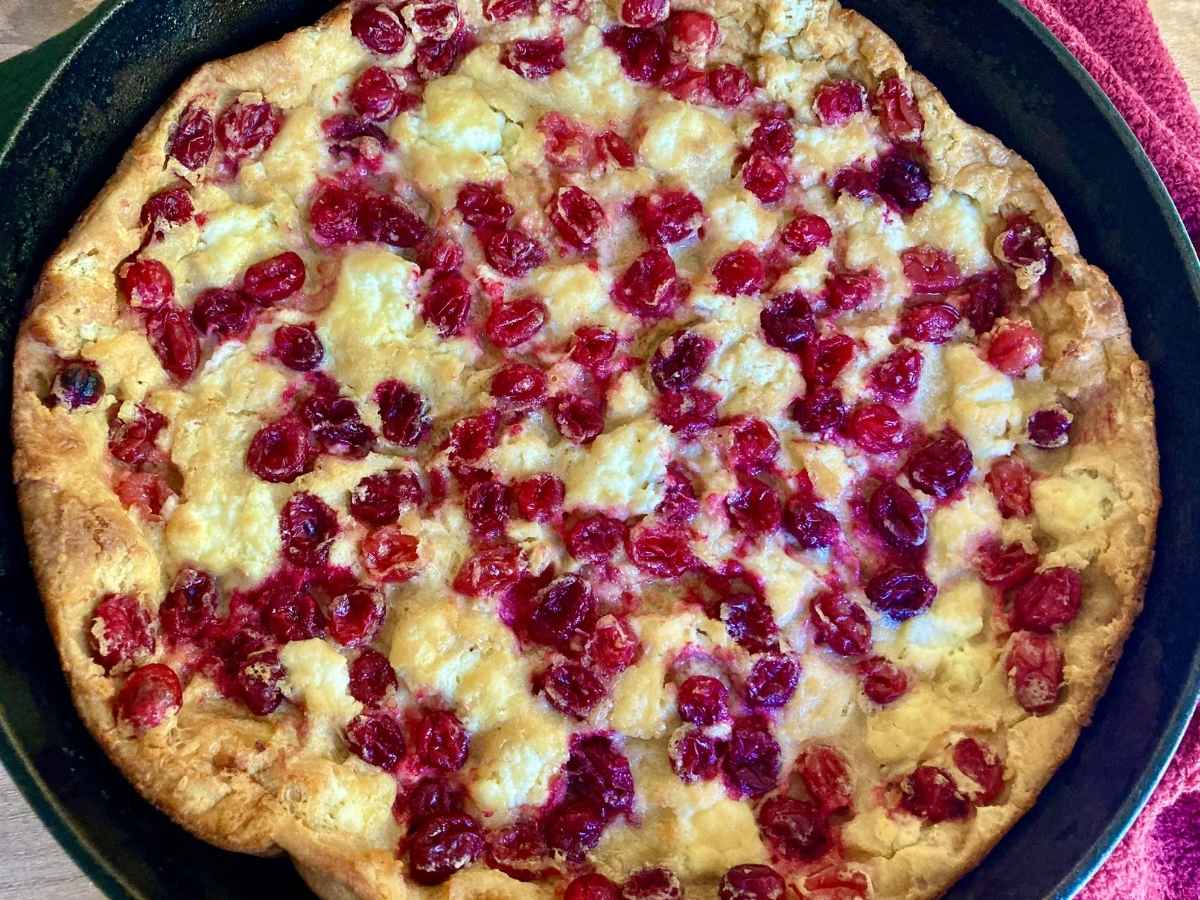
Step 4: Bake for 30 minutes or until the edges are just beginning to turn golden brown. Once you remove it from the oven, the pancake will slightly deflate.
Chef’s tip: Don’t pour in the batter in the skillet early! If the oven isn’t preheated and you’re not ready to bake it, the hot skillet will start to cook it early leading to burnt edges.
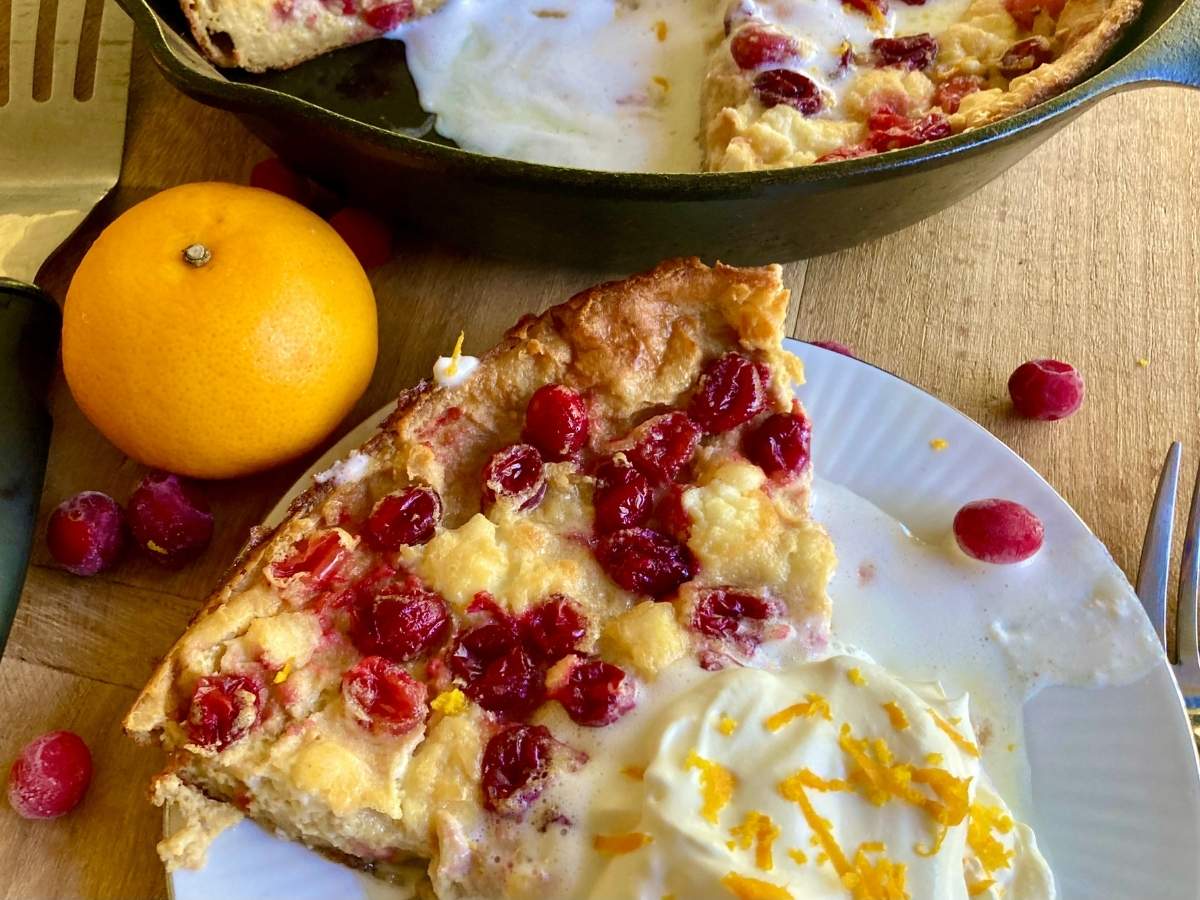
Step 5: Serve warm with your favorite toppings!
If you’re looking for more holiday breakfast ideas, check out my list of 25 gluten-free Christmas breakfast ideas!
Tips for Success
Let the skillet fully preheat in the oven – Cast iron takes a while to heat up, but preheating makes so that the pancake starts cooking the moment the batter hits the pan.
Whisk one last time before pouring the batter – Often, the batter will be ready early and have to sit for a few minutes while the oven finishes preheating. As it sits, the oat flour tends to sink to the bottom of the bowl, so it’s best to give it one last whisk before pouring the batter into the skillet.
Keep the oven door closed – To check on your Dutch baby turn on the oven light, but don’t open the door! This can cause it to deflate and lose its fluffy texture.
Topping Ideas
- Homemade whipped cream
- Maple syrup
- Orange zest
- Warm spices such as cinnamon, nutmeg, and cloves
- Honey

FAQs
No, Dutch baby pancakes are best enjoyed immediately after baking since storing significantly alters the texture.
You can store a leftover Dutch baby pancake in the fridge for 3-5 days. For best results, reheat in the oven.
No, dried cranberries won’t work well in this cranberry Dutch baby, however, you can use fresh or frozen cranberries.
No, this recipe works well with regular white flour, whole wheat flour, or einkorn flour. Almond flour is also delicious, however, it will significantly alter the texture.
Yes, this Dutch baby is delicious with any type of berries or chopped soft fruit (such as peaches). One of my favorite versions is a blueberry cheesecake Dutch baby.
No, freezing will ruin the texture of a Dutch baby pancake.
If you try this recipe, let me know in the comments! Tag me on Instagram @violet_rightathome
Gluten-Free Cranberry Cheesecake Dutch Baby with Oat Flour
Equipment
Ingredients
- 6 eggs
- 1 cup milk dairy or non-dairy
- 1 cup oat flour certified gluten-free
- 1 1/4 cups cranberries fresh or frozen
- 4 ounces cream cheese
- 1/3 cup coconut sugar
- 1/4 cup coconut oil
- 1 teaspoon vanilla extract
- Dash of salt
Instructions
- Preheat oven to 400 degrees.
- Put the coconut oil in a 15" cast iron skillet and place it in the preheating oven.1/4 cup coconut oil
- Cut the cream cheese into 1/2 inch pieces and set aside.4 ounces cream cheese
- In a large mixing bowl, whisk together the eggs, milk, oat flour, coconut sugar, vanilla, and salt.6 eggs, 1 cup milk, 1 cup oat flour, 1/3 cup coconut sugar, 1 teaspoon vanilla extract, Dash of salt
- Once the oven is preheated, pour the batter into the skillet with the melted coconut oil.
- Sprinkle the cranberries and cream cheese pieces on top.1 1/4 cups cranberries
- Bake for 30 minutes or until the edges are starting to turn golden brown.
- Serve warm with toppings of your choice.
Notes
Substitutions
- Can substitute butter for the coconut oil
- Can substitute white sugar for coconut sugar
- Can use regular, whole wheat, einkorn, or almond flour instead of oat flour
Topping ideas
- Maple syrup
- Orange zest
- Whipped cream
- Warm spices such as cinnamon, nutmeg, and cloves
- Honey
Nutrition
If you tried this cranberry cheesecake Dutch baby, I’d love to hear how it turned out for you! Please make sure to come back and leave a comment and a ⭐️⭐️⭐️⭐️⭐️ rating.


I love the rich flavor combination of cranberries and cream cheese. This recipe is a go-to for special occasions!
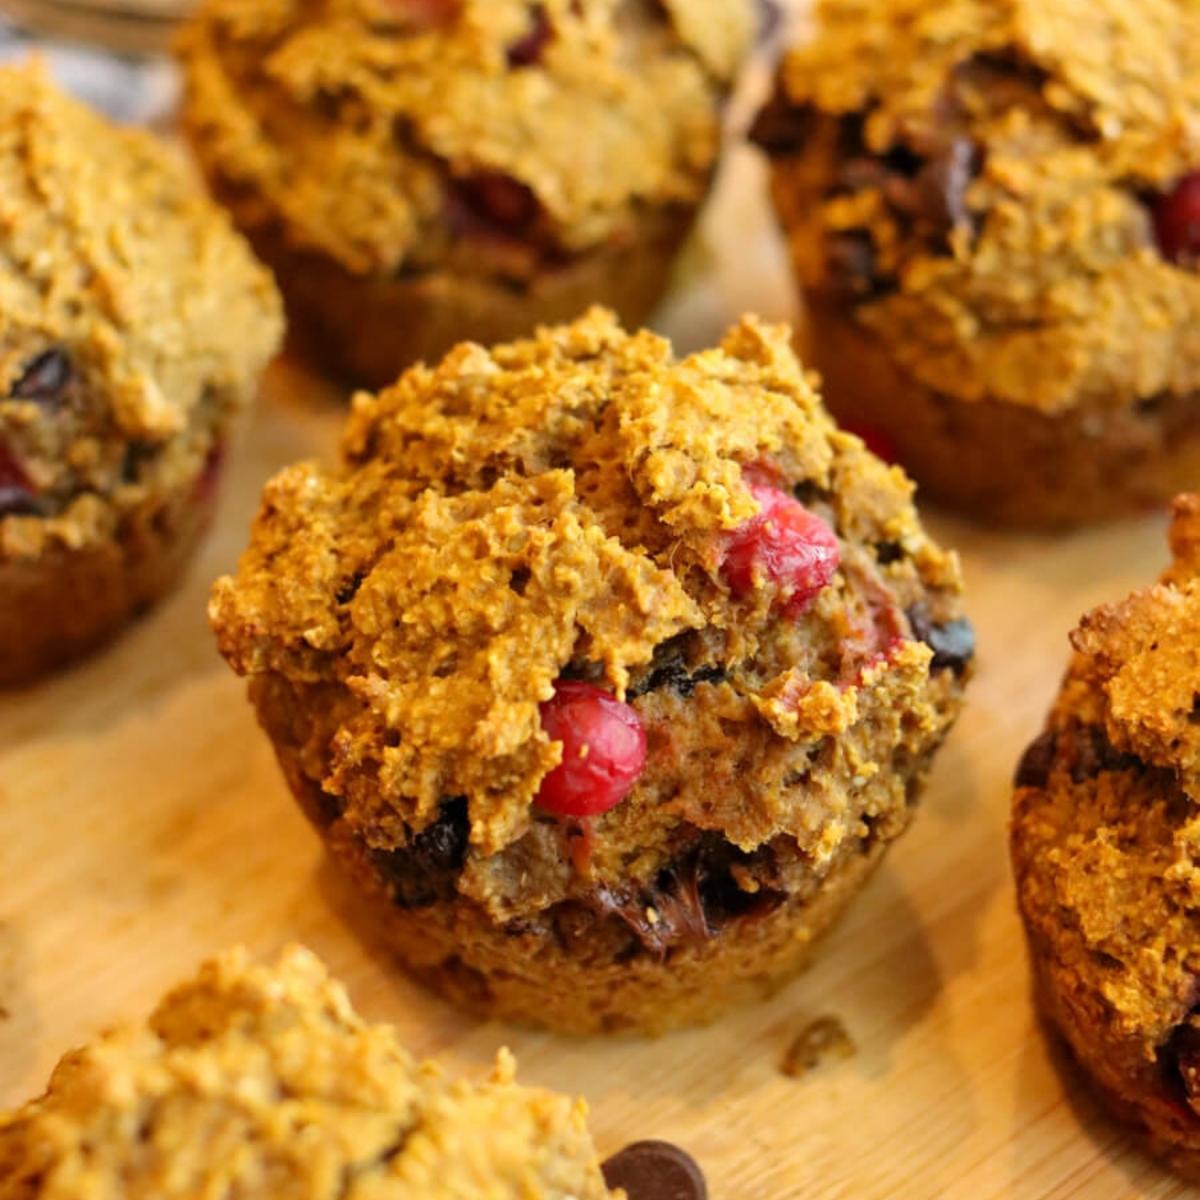
Could this be baked in a muffin tin to make individual Dutch babies?
Yes! That’s such a great idea! They won’t need to bake quite as long, and I’d suggest start checking them around 16-18 minutes to see if they’re done. If they’re puffed up, don’t look gooey in the center, and are slightly browned around the edges, they’re ready to eat 🙂