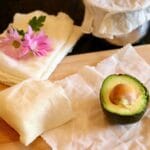
Beeswax Food Wraps
These beeswax food wraps are a fun DIY that will reduce your plastic waste and keep your food fresh and delicious!
Cost: $$
Equipment
- Pinking shears
- Double boiler or a small bowl that fits on top of a regular saucepan
- Small spoon
- Silicone brush
Materials
- Cotton or linen fabric washed and dried
- 4 tablespoons beeswax pastilles
- 3 tablespoons powdered pine resin
- 2 tablespoons jojoba oil
Instructions
- Cut the fabric into your preferred shapes and sizes.
- In a double broiler, melt together the beeswax, jojoba oil, and pine resin.
- Preheat your oven to 300 degrees and line a large baking sheet with parchment paper. Place the baking sheet in the oven while it's preheating to warm.
- Lay a piece of fabric on the baking sheet.
- Stir the melted beeswax mixture and spread it lightly across the fabric using a silicone brush. Don't worry about covering every section with the wax right now.
- Place the baking sheet in the oven for 2 minutes for the wax to melt and then use the brush to make sure every section has wax on it. If you need to, you can add more wax at this point, or, if there's too much, use the next piece of fabric to sop some of it up.
- Put the baking sheet back in the oven for another 2 minutes.
- Remove the food wrap from the oven and hang on a drying rack or clothesline to dry while repeating the process for the rest of your fabric pieces.
Notes
These beeswax food wraps are perfect for storing any type of food except for raw meat. To wash, lightly scrub with cold water and gentle soap.
